How to make self-hosted maps that work everywhere and cost next to nothing
Cross-posted from MuckRock.
For at least a decade now, I’ve told journalists building interactive maps two things:
- You should create maps with a style that fits the story you’re telling and matches your newsroom’s broader design sensibilities.
- You should use a hosted service to do this. Hosting a full map stack yourself is more cost and trouble than it’s worth.
These two ideas have some tension between them. You should own your map design but not the infrastructure that supports it. This is because the most expensive part of building and hosting a map is the time a developer puts into building and maintaining it, and while hosted services aren’t free, they’re generally cheaper than your hourly rate. For the most part, I told people to use Mapbox and treat it as money well spent.
I still strongly believe the first idea, but I’m less sure of the second. Over the past few years, an emerging ecosystem of open-source tools has made self-hosting a map stack both viable and affordable. Beyond cost, self-hosting creates a level of security and durability that’s hard to find with third-party services, which are always at risk of being bought, shut down or simply broken by neglect.
Brandon Liu, who built and maintains one of the central pieces of this ecosystem, calls this new era “post-scarcity web mapping,” and he makes a compelling case for taking true ownership of our mapping tools.
So, if we want to host our own maps, how do we do it?
Back to (map) school
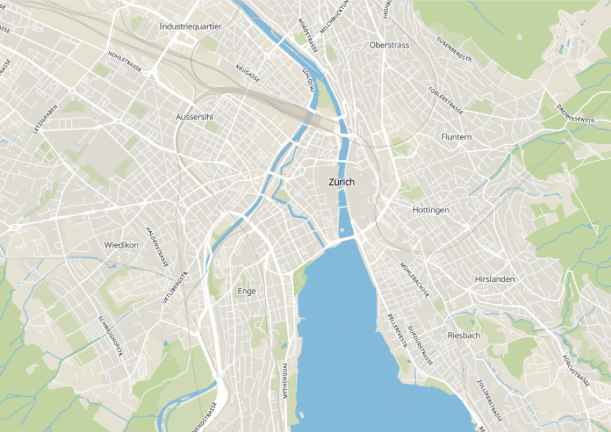
Before I dive into this, it’s worth remembering what a web map is and how it works. The best free resource on this is mapschool.io. Go review that if you need a refresher on projections, rasters versus vectors, heatmaps versus choropleths and other cartography fundamentals. This explanation of vector tiles is also worth reading. Maps are complicated and it’s ok to feel behind.
Data for mapping
A map is a representation of data, but what data? There’s a wide range of options, with an increasing array of open and permissively licensed data to draw from. Some key resources that will be particularly useful for self-hosters:
OpenStreetMap is a free map of the world, created by volunteers and available under a permissive license. Mapbox is built on OSM (and built the id editor used update the underlying data). Geofabrik provides extracts of OSM data from continents down to US states.
Natural Earth provides free downloads of cultural, physical and raster data useful for more zoomed-out maps. It’s a good place to get national, state and sometimes county borders, city locations, coastlines and shaded reliefs.
Government sources: US Census, US Geological Survey, NOAA and other government agencies have a host of data too numerous to list here. I’m usually layering this on top of OSM and Natural Earth.
Overture is a new project that combines OSM, building outlines and point-of-interest (POI) data in an interoperable format. POI data has been especially hard to get until now, because it has the most obvious value to marketers. Google, Mapbox and Foursquare have POI data, but it’s expensive and restricted.
Tiling
Maps you can pan and zoom work by storing data in square tiles, usually 256 or 512 pixels per side. These can be raster images or vector data, and they can be stored in different archive formats. The main two formats these days are MBTiles and PMTiles.
MBTiles is the older format, created by Mapbox and used in production since around 2010. It stores tile data in a single SQLite database. It’s widely supported at this point, and anything that can read from SQLite (which is to say, most anything) can read tile data. Drop an MBTiles file into QGIS and it will render a map. The only downside to MBTiles is that it needs a server.
PMTiles is newer, part of Brandon Liu’s Protomaps project. Like MBTiles, it’s a single file format for vector or raster data, but it has one distinct advantage: it’s optimized for serving over HTTP using byte-range requests. Put a PMTiles file on Amazon S3, Google Cloud Storage or even a VPS running nginx and you have tiled map data.
The easiest place to start is by downloading pre-built map tiles. MapTiler offers downloads of planet- or regional-scale vector and raster tiles in MBTiles format, plus a server to run locally (or wherever). It’ll even serve raster images that work with Leaflet maps.
Protomaps offers daily builds of the whole planet built using OSM and Natural Earth. It’s a giant single file – about 111 GB each – but you don’t necessarily need the whole thing. The pmtiles CLI utility can extract tiles from a bounding box or GeoJSON region. For a small enough area, tiles can fit in Git Large File Storage and a full map stack can live on GitHub Pages.
The pre-tiled data you download from MapTiler or Protomaps will produce a fairly standard street map that will work as a base for most visualizations. But if you need something more specific, or with different data layered in, there are three tools that will tile data locally: Planetiler, tilemaker and tippecanoe.
Planetiler is how Protomaps generates daily builds. As its name implies, it’s built to generate a planet’s worth of tiles, though it can also turn out a smaller region. It uses a complicated Java-based build system, but it’s incredibly fast. Once you have all your data downloaded (which can take a while), a high-end machine can generate a planet tileset in under an hour.
Tilemaker is a similar project that builds a single executable and has a simpler configuration setup (using JSON and Lua). It isn’t intended to work at planet-scale, but for smaller regions, it’s plenty fast.
Tippecanoe is the oldest of the three tools. Erica Fischer created it while working at Mapbox and now maintains it at Felt. Tippecanoe is what I use to tile data layers, like in this wildfire map. It has more knobs and dials that can tweak the way your data ends up in tile layers, but it’s also going to take the longest to generate tiles.
All three tools can generate MBTiles or PMTiles.
Styling and rendering
At this point, we’ve found data and split it into tiles. To turn it into an actual map, we need a style and a way to render it in a web browser.
Rendering is straightforward: Use Maplibre, the open-source fork of Mapbox GL. While the two projects have diverged somewhat since the fork, familiarity with Mapbox will translate easily enough to Maplibre.
To render your map, you need a style:
A MapLibre style is a document that defines the visual appearance of a map: what data to draw, the order to draw it in, and how to style the data when drawing it. A style document is a JSON object with specific root level and nested properties. This specification defines and describes these properties.
You can write this JSON document by hand, but that’s only practical for the simplest maps. A full street map will have dozens of layers.
Fortunately, there are existing styles available, free of charge and permissively licensed. OpenMapTiles provides both styles and a schema.
Both MapTiler and Protomaps offer reasonable defaults for a map. This wildfire map and this map of areas covered by the Radiation Exposure Compensation Act use Protomaps and its basemaps library. Tileserver comes packaged with OpenMapTiles styles.
For further customization, there’s Maputnik, an open-source editor for MapLibre (and Mapbox) styles. Unfortunately, Maputnik can’t work with PMTiles files natively, so it needs an intermediate server that generates x/y/z URLs from a PMTiles or MBTiles file.
Fonts and icons
Map styles nearly always need fonts and sprite sheets to display things like place names, icons and road shields. This part of the stack is hard to see on its own, and it took me longer than I expected to figure it out, so I’m including a dedicated section here.
If you’re using the Protomaps basemaps library, fonts and sprites come bundled (via the Protomaps basemaps-assets repo) and hosted on GitHub Pages.
Styles from OpenMapTiles include fonts and sprites hosted by MapTiler, but these might require an API key.
If you want to use custom fonts and icons, two tools will generate the files you need: font-maker and spreet.
Font-maker has a web interface and a (mostly undocumented) command-line interface. To see how the CLI works, look at the create_fonts.sh script in the Protomaps basemaps-assets repo.
Spreet has its own tutorial and lots of examples.
Hosting and serving
If you’ve made it this far, congratulations, you should now have geographic data, turned into tiles, a style to render it and maybe custom fonts and icons. This is a lot, and it’s part of the reason there are companies ready to sell you a monthly plan that will do all this for you. There’s no shame in paying for a service that saves you time and effort.
But we have a map now, so where are we going to put it?
If you’re using MBTiles, you’ll need a server. Fly.io will host anything you can put in a Docker container.
If you generated PMTiles instead, any static file server that can serve byte-range requests with CORS headers will work. The Protomaps hosting documentation lists several options and recommends Cloudflare R2. A small enough tileset will fit on GitHub Pages, which has a total size limit of 1 GB.
Examples
The first time I saw a news organization exploring this approach to self-hosted maps was Kevin Schaul’s work with the Washington Post.
I built the wildfire map above using Protomaps and Svelte (for UI elements). The code is on GitHub.
Simon Willison has a good demo and walkthrough of his process mapping Half Moon Bay using Protomaps. The tiles are small enough to fit in a GitHub repo.
Evan Wagstaff built a demo workflow to generate tiles using Planetiler and Fly.io for NICAR23 in Nashville.